https://www.inflearn.com/course/ansible-%EC%8B%AC%ED%99%94/lecture/10798?speed=1&tab=curriculum
[심화] 앤서블(Ansible)을 깊이 있게 활용하기 - 인프런 | 학습 페이지
지식을 나누면 반드시 나에게 돌아옵니다. 인프런을 통해 나의 지식에 가치를 부여하세요....
www.inflearn.com
FACT(s)란?
호스트들에 맞게 동적으로 할당되는 변수 인자를 말한다.
엔서블 코어 또는 플레이북을 작성할 때 유용하게 사용할 수 있는 인자들을 미리 정의해 둠
"ansible_distribution": "CentOS",
	"ansible_distribution_major_version": "7",
    "ansible_distribution_release": "Core",
    "ansible_distribution_version": "7.3.1611"

"ansible_distribution": "Ubuntu",
"ansible_distribution_major_version": "14",
"ansible_distribution_release": "trusty",
"ansible_distribution_version": "14.04"
제공되는 인자 값 확인
# ansible <인자 값을 확인하고자 하는 노드> -m setup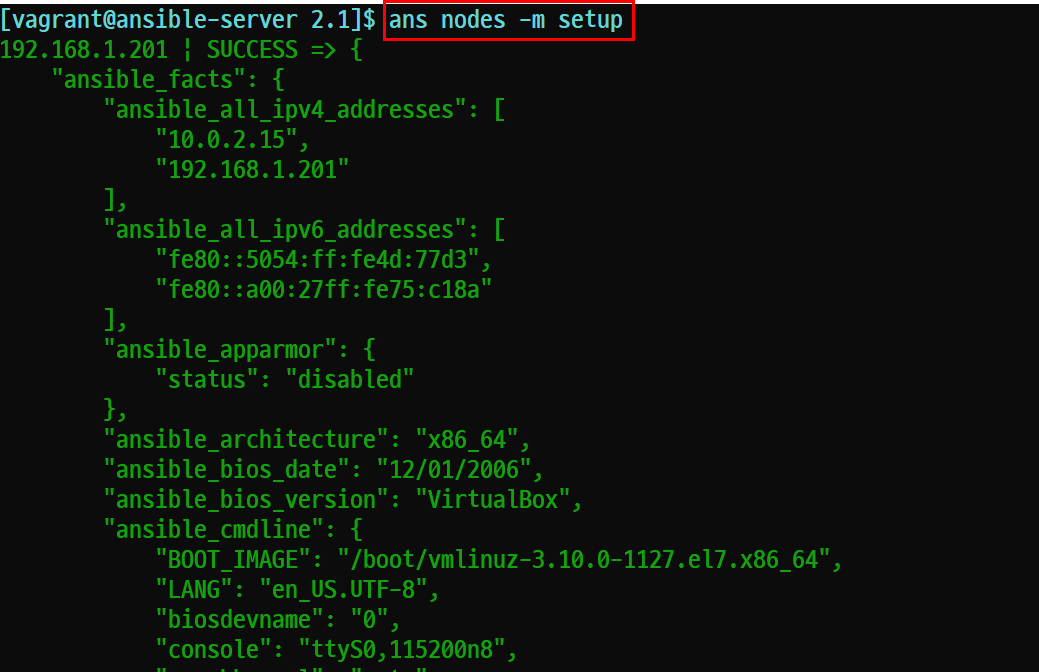
# ansible nodes -m setup >> facts_4_nodes.txt너무 많은 정보가 한꺼번에 출력되어 보기 힘드므로 리다이렉션을 이용하여 파일로 저장한다.
# vi facts.yml
---
- name: print ipv4.address for nodes
hosts: nodes
#gather_facts: no
tasks:
- name: debug by msg
debug:
msg:
- "eth0's ip {{ ansible_eth0.ipv4.address }}"
- "eth1's ip {{ ansible_eth1.ipv4.address }}"
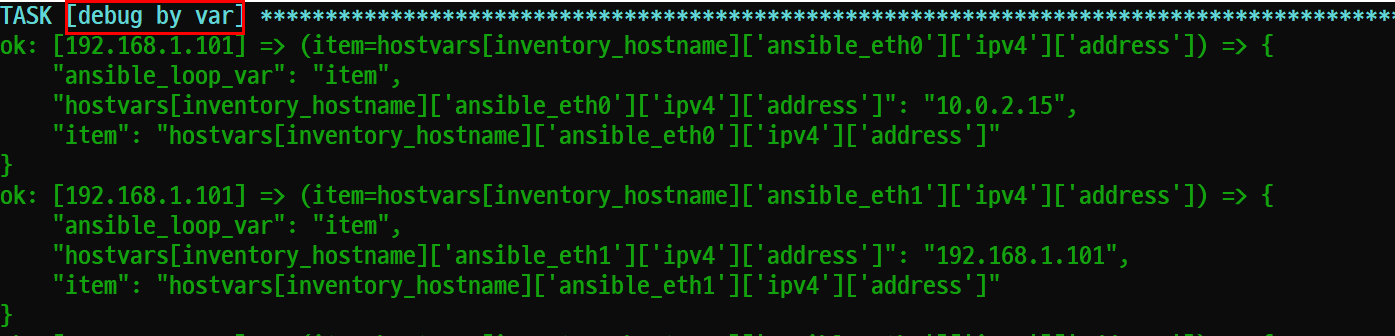
- name: debug by var
debug:
var: "{{ item }}"
with_items:
- hostvars[inventory_hostname]['ansible_eth0']['ipv4']['address']
- hostvars[inventory_hostname]['ansible_eth1']['ipv4']['address']gather_facts를 no로 설정하면 fact인자를 수집하지 않기 때문에 플레이북 동작 성능이 향상된다.
하지만 fact인자를 수집하여 사용하기 위해서는 해당 부분을 주석처리하거나 지워주면 된다.
수집된 fact인자를 화면에 출력하기 위해서는 debug 모듈이 사용되며 msg 또는 var를 사용하면 된다.
# ansible-playbook facts.yml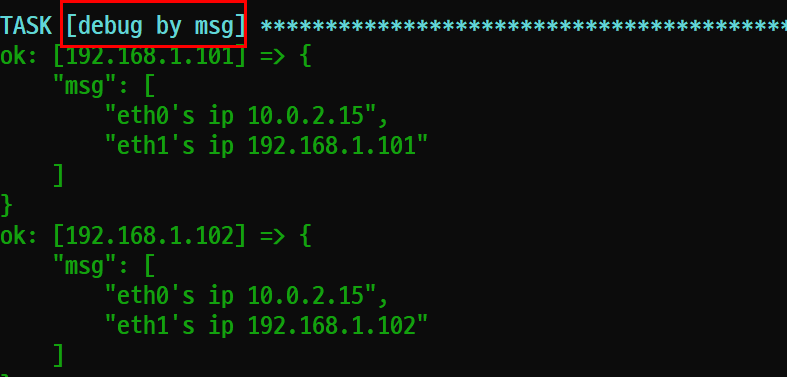
FACT(s) 사용법
---
- name: Install nginx on the nodes
  hosts: nodes
  become: yes

  tasks:
    - name: Install nginx web server
      action: "{{ ansible_pkg_mgr }} name=nginx state=present update_cache=yes"
      when: ansible_distribution == 'ubuntu'
FACT(s) 인자를 사용하면 코드내에서 운영체제를 식별하여 코드가 동작하도록 설정할 수 있다.
1. when을 사용하지 않았을 때
---
- name: Install nginx on the ubuntu nodes
  hosts: nodes
  become: yes

  tasks:
    - name: Install nginx web server
      action : "apt name=nginx state=present update_cache=yes"
ansible playbook 코드를 위와 같이 작성한다.
ansible-playbook sim_nginx-install_wo_when.yml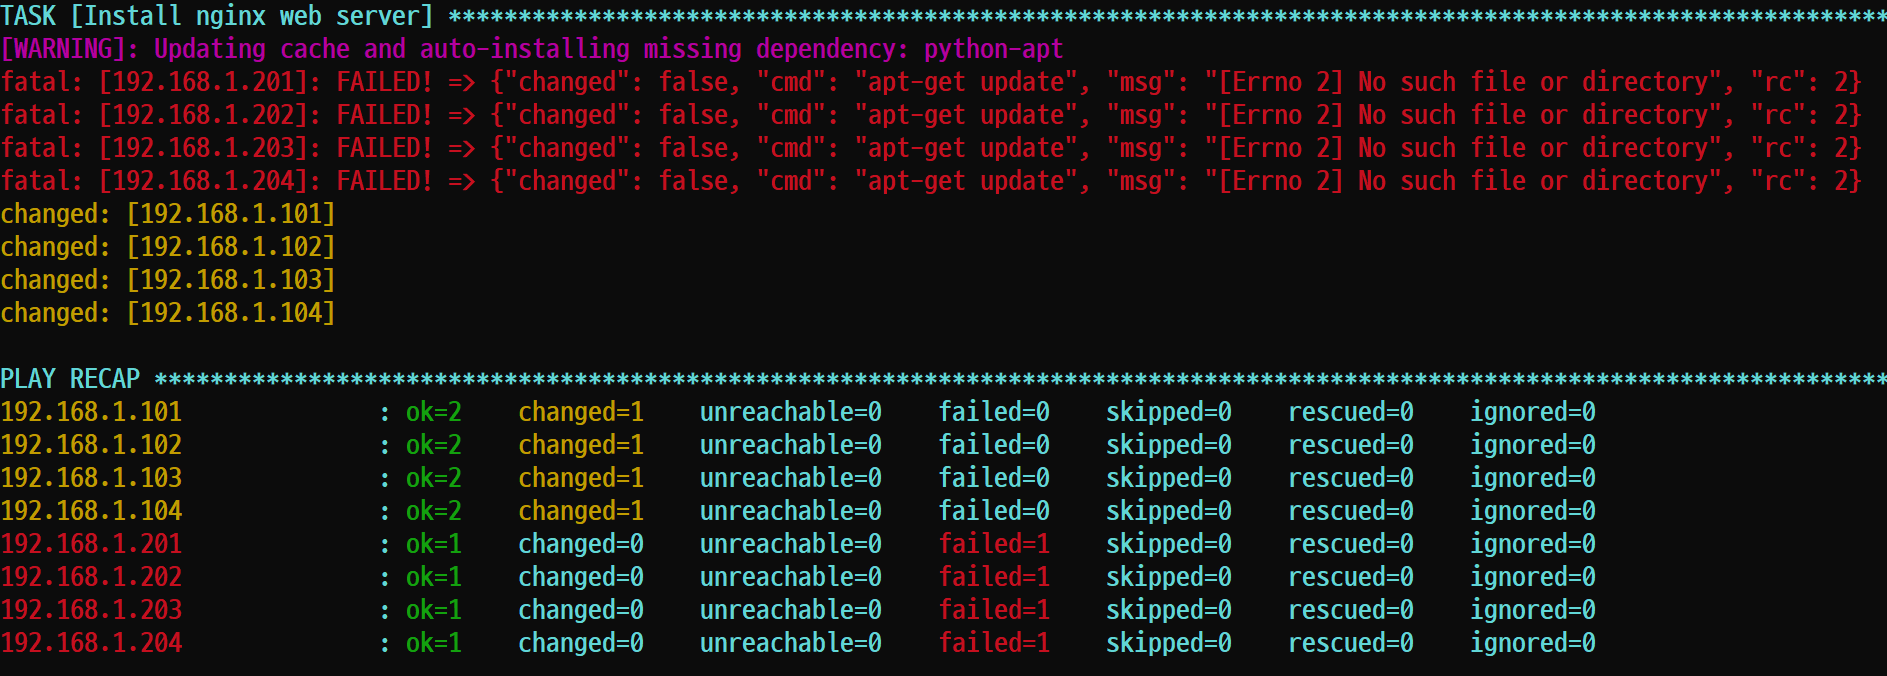
when을 사용하지 않으면 모든 노드에 대해 코드가 동작하기 때문에 우분투쪽은 apt-get 명령어를 통해 정상적으로 nginx가 설치되지만 CentOS는 yum을 사용해야되기 때문에 설치가 진행되지 않고 Failed가 출력된다.
2. when을 사용했을 때
---
- name: Install nginx on the nodes
  hosts: nodes
  become: yes

  tasks:
    - name: Install nginx web server
      action : "{{ ansible_pkg_mgr }} name=nginx state=present update_cache=yes"
      when : ansible_distribution == 'Ubuntu'
when을 위와 같이 사용하면 ubuntu 운영체제에만 해당 코드가 동작하게 된다.
ansible-playbook sim_nginx_install_w_when.yml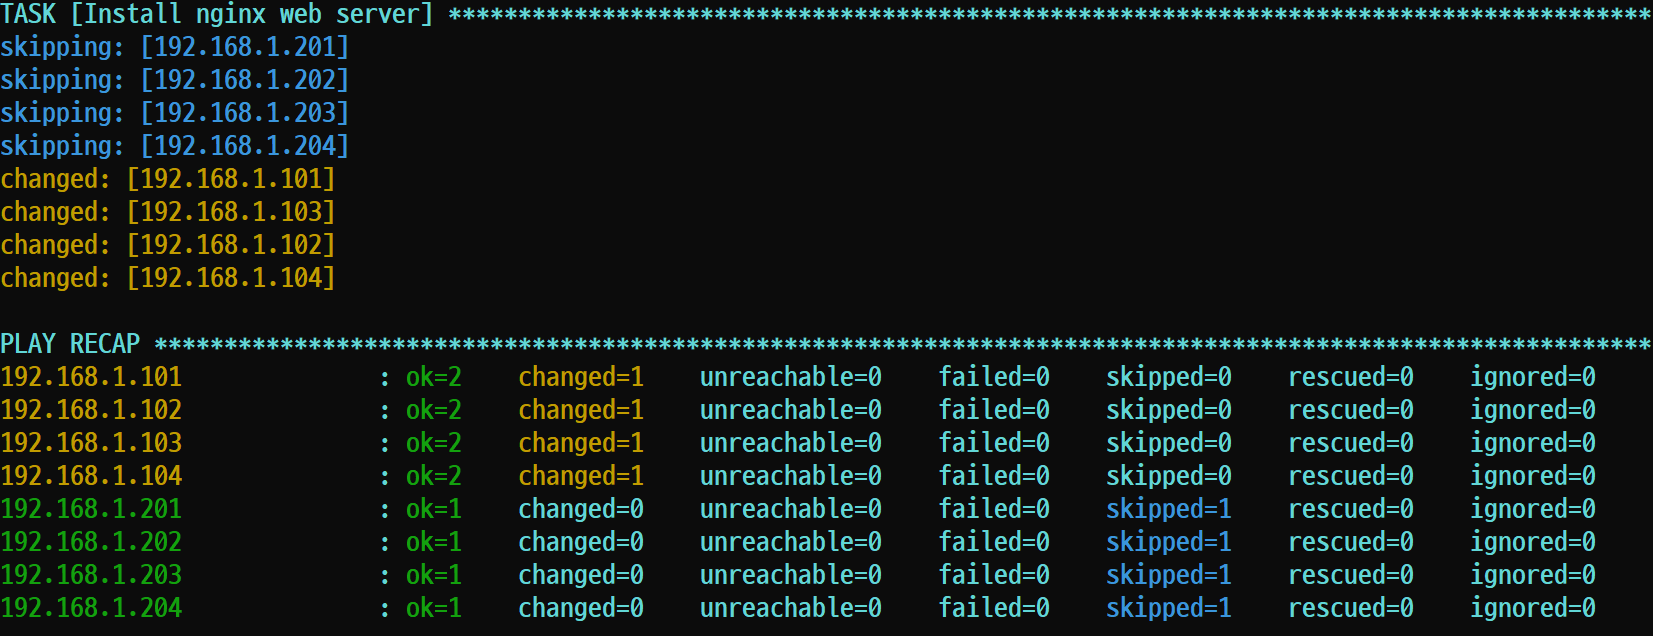
플레이북을 동작시켜 확인해보면 Failed가 아닌 skipped 처리되어 CentOS7에는 설치를 시도하지 않고 생략하는 모습이다.
'Ansible' 카테고리의 다른 글
| 기존에 작성한 Playbook을 짜임새 있게 재구성하기 (0) | 2021.07.22 |
|---|---|
| include_tasks와 if를 활용한 nginx 설치 플레이북 작성 (0) | 2021.07.22 |
| Ansible 구성 authorized_keys 등록 자동화 (0) | 2021.07.21 |
| Ansible 서버 Known_hosts에 node 등록 자동화 (0) | 2021.07.21 |
| Ansible 사용시 유용한 디버그 기능 (0) | 2021.07.20 |