Prometheus와 Grafana를 활용한 모니터링(1)
서버와 같은 머신들의 상태를 Prometheus와 Grafana를 사용하여 깔끔한 그래프로 모니터링이 가능하다.
서버에는 Exporter를 설치하여 각종 지표를 노출하고, Prometheus가 해당 지표를 모아 저장하며, Grafana가 데이터를 가져와서 각종 그래프로 보여준다.
서버 -> Exporter -> Prometheus -> Grafana -> Browser
프로메테우스 설치
$ wget https://github.com/prometheus/prometheus/releases/download/v2.27.1/prometheus-2.27.1.linux-amd64.tar.gz
$ tar xvfz prometheus-2.27.1.linux-amd64.tar.gz
$ cd prometheus-2.27.1.linux-amd64
$ cp prometheus /usr/local/bin/
$ mv prometheus-2.27.1.linux-amd64 /etc/prometheus
$ mkdir -p /data/prometheus
$ vi /etc/systemd/system/prometheus.service

[Unit]
Description=Prometheus Server
Documentation=https://prometheus.io/docs/introduction/overview/
After=network-online.target

[Service]
User=root
Restart=on-failure

#Change this line if you download ther
#Prometheus on different path user
ExecStart=/usr/local/bin/prometheus \
  --config.file=/etc/prometheus/prometheus.yml \
  --storage.tsdb.path=/data/prometheus \
  --web.console.templates=/etc/prometheus/consoles \
  --web.console.libraries=/etc/prometheus/console_libraries \
  --web.listen-address=0.0.0.0:9090 \
  --web.enable-admin-api
[Install]
WantedBy=multi-user.target
위와 같이 systemd에 서비스를 등록해준다.
$ systemctl daemon-reload
$ systemctl start prometheus
$ systemctl enable prometheus

$ firewall-cmd --permanent --add-port=9090/tcp
$ firewall-cmd --reload
데몬 실행 및 9090/tcp를 방화벽에 등록해준다.

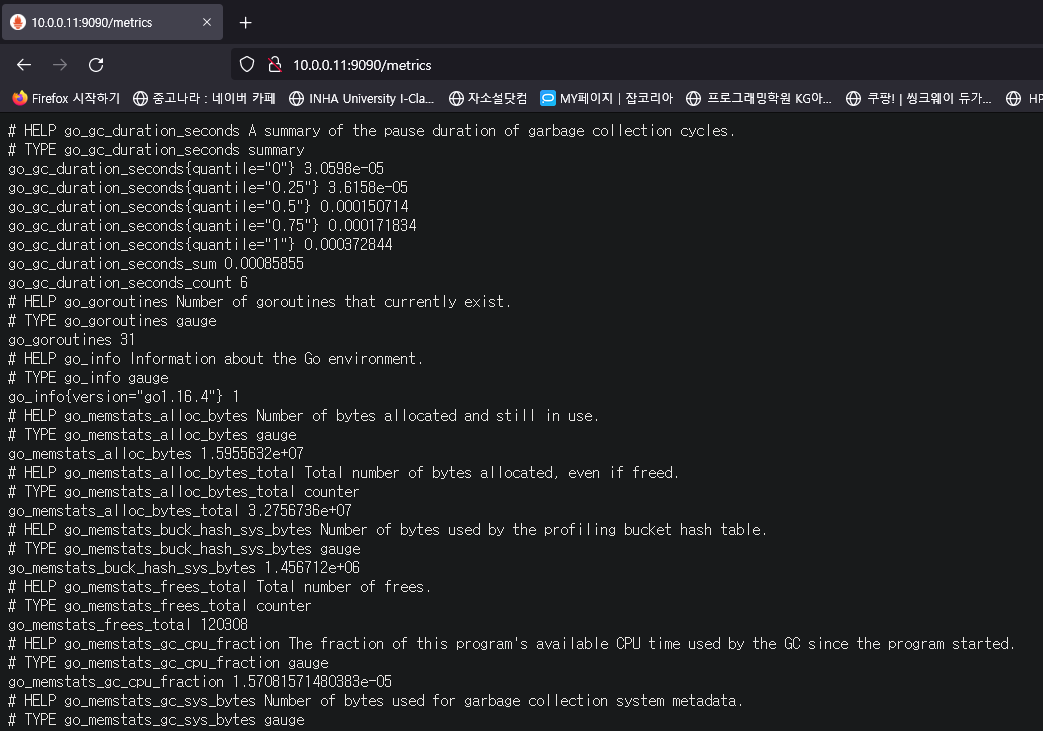
해당 서버의 IP주소와 9090번 포트로 접근하면 위 사진처럼 prometheus에 접근하게 된다.

metrics에 접근하면 프로메테우스가 제공하는 메트릭 정보를 확인할 수 있다.
expression browser 사용하기
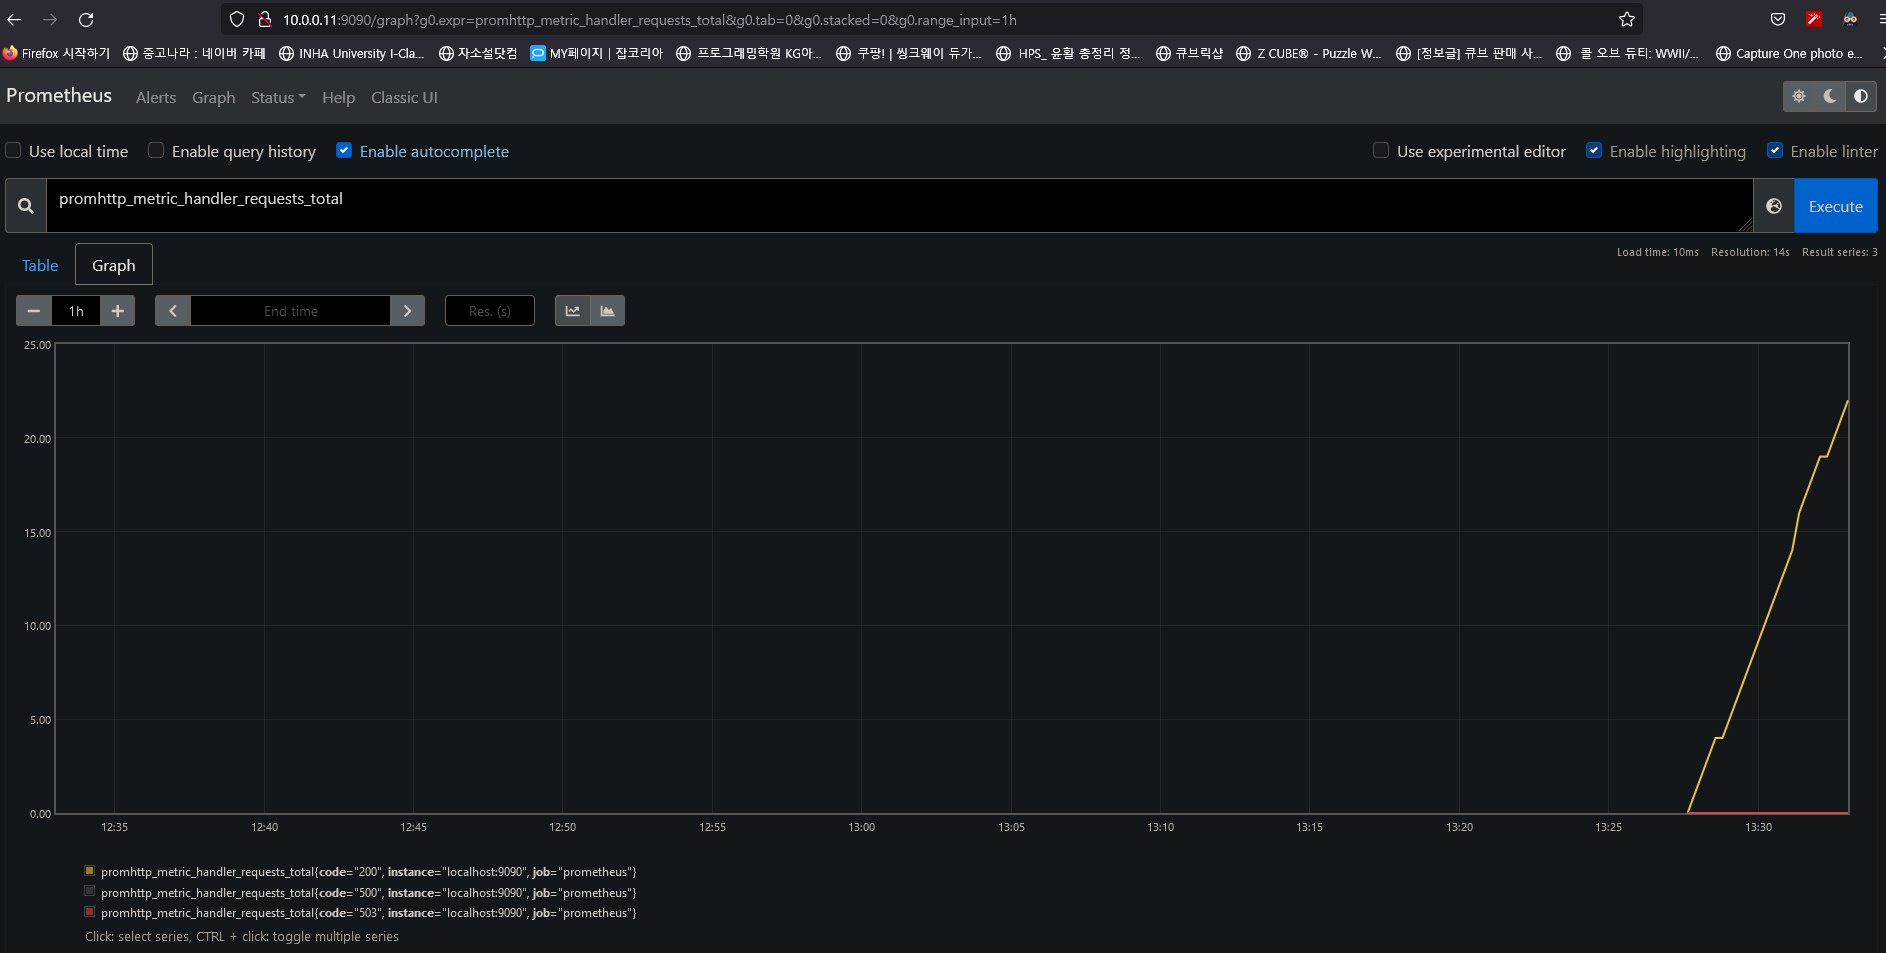
프로메테우스에서 수집한 정보를 그래프로 확인하는 방법이다. '해당 서버의 IP주소:9090'으로 접근한 사이트에서 Expression 검색창에 다음과 같이 입력한 후 Excute한다.
promhttp_metric_handler_requests_total
promhttp_metric_handler_requests_total 검색은 위에서 metrics 정보를 요청하는 URL의 호출횟수를
나타내는 키워드다. 아직 키워드에 필터를 주지 않았기 때문에 HTTP code 3가지에 대한 정보가 모두 보인다.
이때 200번 code에 대해서만 보고싶다면 다음과같이 Expression에 입력한다.
promhttp_metric_handler_requests_total{code="200"}Node_Exporter 사용하기
Prometheus 에서 만든 프로그램중에 Node Exporter는 하드웨어와 OS 커널 메트릭 데이터를 추출하기 위한것으로 Go언어로 개발되었다.
이제 Prometheus 설정에서 Node Exporter 에 대한 정보를 추가하여 모니터링을 해볼것이다.
Node Exporter 다운로드 및 실행
$ wget https://github.com/prometheus/node_exporter/releases/download/v1.1.2/node_exporter-1.1.2.linux-amd64.tar.gz
$ tar xvfz node_exporter-1.1.2.linux-amd64.tar.gz

$ cd node_exporter-1.1.2.linux-amd64
$ ./node_exporter --web.listen-address 127.0.0.1:8080
$ ./node_exporter --web.listen-address 127.0.0.1:8081
$ ./node_exporter --web.listen-address 127.0.0.1:8082
Prometheus 설정 변경
$ vi /etc/prometheus/prometheus.yml

  # The job name is added as a label `job=<job_name>` to any timeseries scraped from this config.
  - job_name: 'node'
    scrape_interval: 5s

    # metrics_path defaults to '/metrics'
    # scheme defaults to 'http'.

    static_configs:
    - targets: ['localhost:8080','localhost:8081']
      labels:
        group: 'production'

    - targets: ['localhost:8082']
      labels:
        group: 'canary'
prometheus.yml 파일의 아래부분을 위와 같이 수정한다.
Node Exporter 로 3개의 타겟을 만들었고 Prometheus 에서는 3개의 타겟에 대해 'job' 이라는
하나의 job_name을 지정한다.
그룹을 production, canary 2개로 나누었으며 변경된 내용을 적용하기위해 Prometheus를
재시작 해야한다.
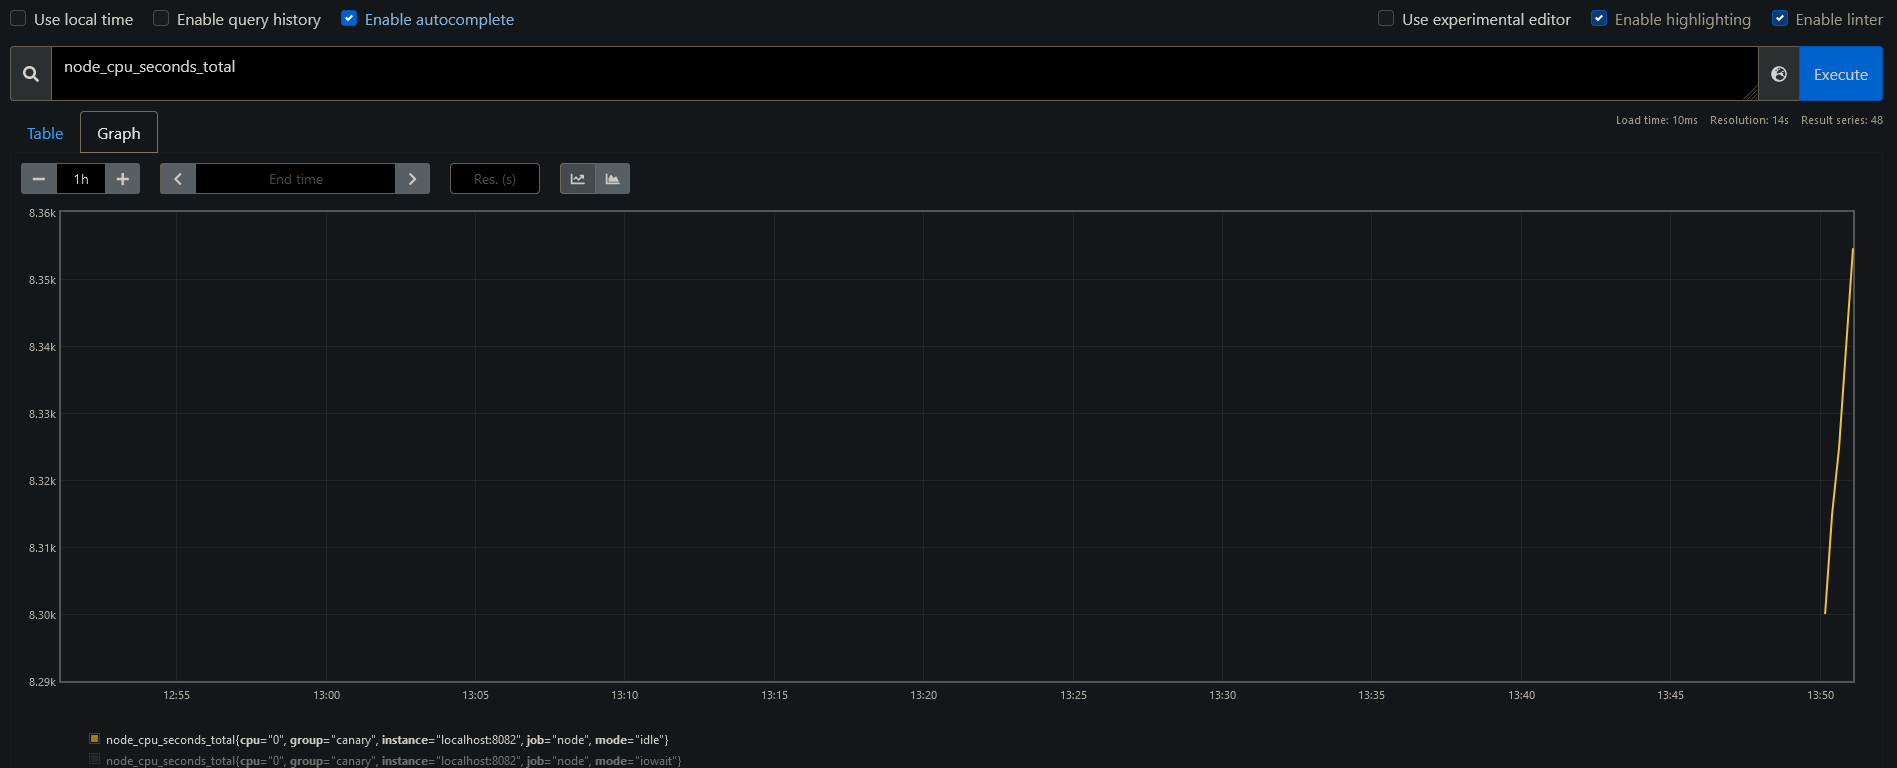
systemctl restart prometheus새로 추가한 타겟들에 대해 데이터를 수집하는것을 확인하기 위해 node_cpu_seconds_total 를 입력하여 확인해본다.

현재 상태는 크게 문제가 없지만 시계열 데이터가 수백 수천개라면 집계시에 속도가 느려질수 있다.
이를 효율적으로 하기 위해 Prometheus 는 recodrding rule을 설정하여 새로운 시계열 데이터에 대해
미리 기록을 할 수 있다.
Prometheus.rules.yml 생성 및 작성
$ vi prometheus.rules.yml

groups:
- name: cpu-node
  rules:
  - record: job_instance_mode:node_cpu_seconds:avg_rate5m
    expr: avg by (job, instance, mode) (rate(node_cpu_seconds_total[5m]))
Prometheus.yml 수정
$ vi prometheus.yml

....

rule_files:
  - 'prometheus.rules.yml'

....

$ systemctl restart prometheus
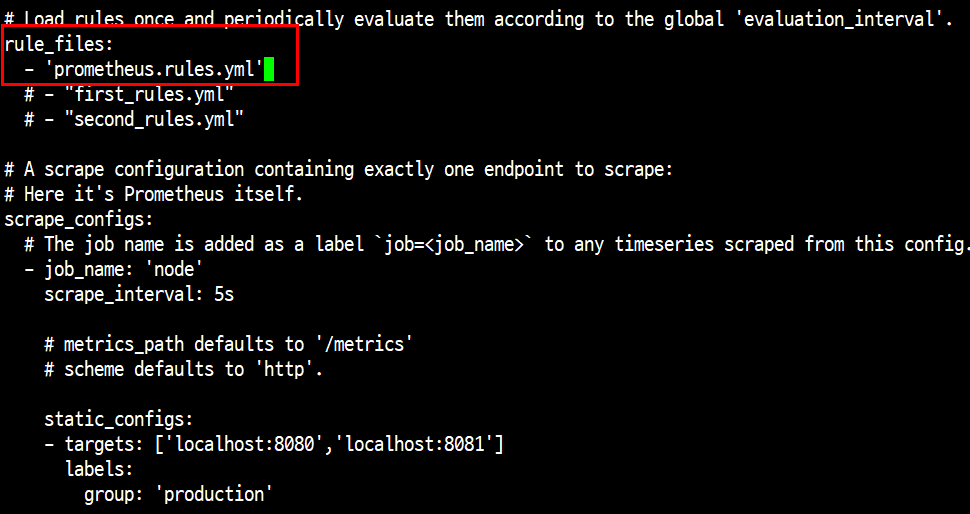
prometheus.rules.yml 파일을 prometheus.yml과 동일 경로에 생성하고 prometheus.yml에 rules 파일의 이름을 지정한다.
설정을 마쳤다면 Prometheus 를 재시작하여 job_instance_mode:node_cpu_seconds:avg_rate5m 을 Expression 에 입력하여 그래프를 확인할 수 있다.

참고 사이트
- https://mycup.tistory.com/318
- https://essem-dev.medium.com/%ED%94%84%EB%A1%9C%EB%A9%94%ED%85%8C%EC%9A%B0%EC%8A%A4%EC%99%80-%EA%B7%B8%EB%9D%BC%ED%8C%8C%EB%82%98%EB%A1%9C-%EA%B0%9C%EB%B0%9C-%EC%84%9C%EB%B2%84-%EB%AA%A8%EB%8B%88%ED%84%B0%EB%A7%81%ED%95%98%EA%B8%B0-8942aea724b3
- https://ksr930.tistory.com/116
'Monitoring' 카테고리의 다른 글
| ELK Stack 구성해보기 (0) | 2021.08.03 |
|---|---|
| 프로메테우스(Prometheus) 알아보기 (1) | 2021.08.01 |
| [ELK Stack] 2. Filebeat 설치 및 ELK Stack을 통한 로그 관리 (0) | 2021.07.31 |
| [ELK Stack] 1. ELK 구축 및 실행 (0) | 2021.07.30 |
| ELK Stack이란? (0) | 2021.07.29 |